A sticking drawer can make an old dresser feel unusable, but the problem is often simple. Wood swells with humidity, runners wear down, and years of paint can create stubborn friction. Learning How to fix a sticking wooden drawer in an old dresser begins with careful observation, not force.
I have repaired drawers that seemed completely stuck. One had a warped bottom, while another dragged against a loose wooden guide. Removing the drawer gently revealed the real cause. That small inspection prevented further damage to the frame. It also showed why pulling harder is rarely the best solution.
This guide explains how to inspect the drawer, identify rubbing points, and make controlled repairs. You may need a screwdriver, sanding block, carpenter’s pencil, and a small amount of paste wax. A level surface and bright light will also help. Work slowly around old joints, because aged wood can split without warning.
Small adjustments matter.
The process may include cleaning dust, tightening hardware, sanding swollen areas, or realigning the drawer guides. Avoid removing too much material. I once sanded a drawer too aggressively and created a loose fit that required additional repair. That mistake is easy to repeat when patience runs short.
You will also learn when wax is appropriate and when structural damage needs more attention. Moisture, cracked joints, or severely distorted wood may require an experienced furniture restorer. With measured steps and realistic expectations, many sticking drawers can return to smooth, reliable use without losing their original character.
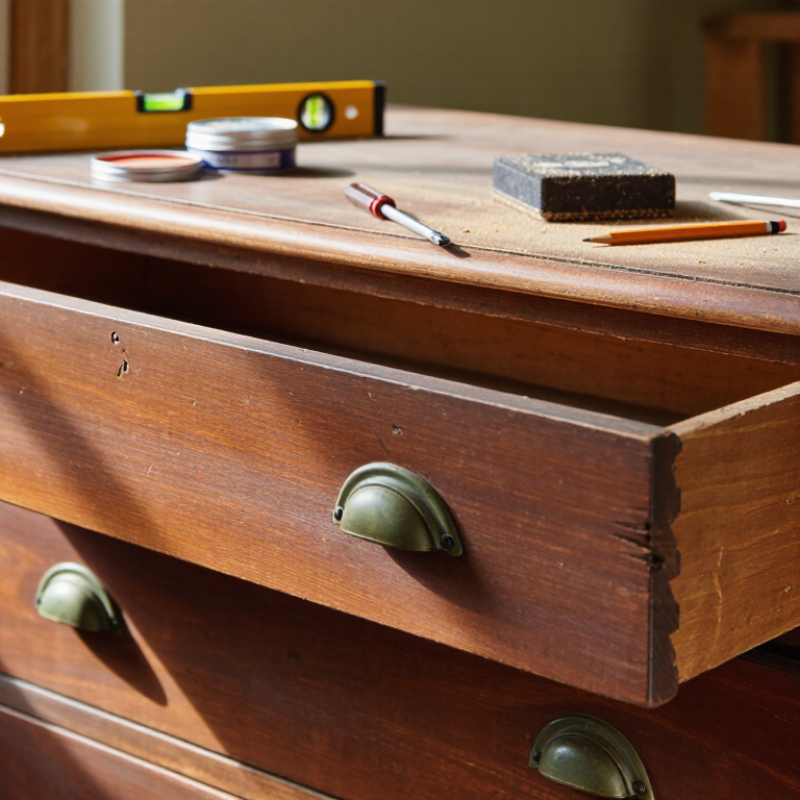
Before repairing a sticking drawer, empty it completely and inspect the dresser in bright, angled light. Remove the drawer slowly, supporting both sides to prevent further damage. Look for worn runners, loose screws, swollen wood, and small splits along the drawer edges. Old dressers often shift slightly over time, so the opening may not be perfectly square.
Test the drawer several times, using gentle, even pressure. Mark every binding point with low-tack painter’s tape or a sharp pencil. Check the top edge, bottom edge, and both side gaps. A thin strip of paper can reveal tight areas; slide it around the opening and note where it stops. Feel for roughness with your fingertips, but wear eye protection if cracked wood may shed splinters.
I once blamed the drawer runners immediately. That assumption was wrong. The real obstruction was a raised patch of finish near the front corner. Mark the exact spot, then inspect the matching area inside the cabinet. Also check whether the drawer twists when pulled. A twisted drawer may bind in more than one place, making one mark misleading.
Avoid sanding anything yet. I have removed material too early before, and the drawer later became loose. Photograph the marks and record their positions before choosing a repair.
A sticking drawer usually needs measured clearance, not more force. Remove the drawer and inspect both side gaps with a steel ruler or feeler gauge. Aim for about 1/32 to 1/16 inch per side, measured at the tightest point. That gives the drawer roughly 1/16 to 1/8 inch of total side clearance. Measure several locations, because old dresser cases are rarely perfectly square.
Wood Movement Wood movement makes this gap practical. The USDA Forest Products Laboratory’s Wood Handbook reports that tangential shrinkage is often about twice radial shrinkage in common hardwoods. Seasonal humidity can therefore change a drawer’s fit across its width. The Environmental Protection Agency generally recommends indoor relative humidity between 30% and 50%, a useful range for reducing extreme movement. Do not sand until the drawer rattles.
Mark only the swollen areas with a pencil. Remove small amounts using a sharp block plane or fine sandpaper, then test the drawer repeatedly. Keep the side edges parallel.
I once sanded one corner too aggressively, and the drawer developed an uneven reveal. That mistake was avoidable.
The Architectural Woodwork Institute publishes tolerances in fine increments, including 1/32-inch measurements, which supports careful, incremental fitting. After adjustment, apply a thin coat of paste wax to the runners, not the entire drawer. Recheck the gaps after several days of normal indoor use.
A sticking wooden drawer often signals moisture movement, not poor craftsmanship. Wood absorbs and releases water as indoor humidity changes. The USDA Forest Products Laboratory’s Wood Handbook identifies 6–8% moisture content as a suitable target for indoor furniture in typical heated environments. Measure the drawer and cabinet sides with a calibrated pin moisture meter. Check several locations, including the back edge and lower rail. One reading can mislead you.
If the wood measures above 8%, let the dresser acclimate indoors for several days. Keep it away from radiators, vents, and damp exterior walls. The National Wood Flooring Association reports that wood movement increases when indoor relative humidity changes significantly. Although furniture is thinner than flooring, the same moisture principle applies. After the drawer stabilizes, mark shiny contact spots with chalk. Remove tiny amounts with a sharp plane or fine sandpaper. Do not aggressively sand the entire drawer. I have made that mistake, and the loosened fit later became obvious.
Tips: Keep indoor humidity near 30–50% when practical. Recheck moisture content after seasonal changes. Apply a thin coat of wax to clean runners, but avoid hiding a swollen joint. Seal exposed end grain after repairs. The USDA Wood Handbook notes that coatings slow moisture exchange; they do not stop it. A drawer that still sticks may have a twisted case, loose joints, or uneven runners. Moisture testing narrows the problem, but it cannot replace careful inspection.
| Inspection Dimension | Reference Reading or Condition | What It May Indicate | Recommended Action |
|---|---|---|---|
| Overall wood moisture content | 6–8% for typical indoor furniture in the United States | A practical target range for interior woodwork; readings can vary with local climate and season. | Use a calibrated moisture meter and compare several locations rather than relying on one reading. |
| Drawer front and drawer box | Readings should generally be close to one another and within the indoor target range. | A substantial difference may contribute to uneven swelling, shrinking, or binding. | Measure both parts at the center and near the ends; allow the wood to acclimate before permanent alterations. |
| Reading above 8% | Higher than the stated indoor-furniture target | Moisture-related swelling may be making the drawer wider or the runners tighter. | Move the dresser away from damp walls, leaks, kitchens, bathrooms, and direct floor moisture; improve room ventilation and recheck gradually. |
| Reading below 6% | Lower than the stated indoor-furniture target | The wood may have shrunk, opened joints, or changed alignment; dryness alone does not prove the cause of sticking. | Avoid adding water directly. Maintain stable indoor conditions and inspect for warped parts, damaged runners, or loose fasteners. |
| Measurement locations | At least three areas: drawer front, drawer side, and dresser opening or runner area | A single spot can miss localized dampness or a moisture gradient. | Keep the test locations consistent and record the readings before and after environmental changes. |
| Drawer alignment | Gaps appear reasonably even on both sides and across the top. | Uneven gaps can point to a twisted cabinet, tilted dresser, loose joints, or a warped drawer. | Check that the dresser is level, tighten loose hardware carefully, and inspect the drawer for racking before sanding. |
| Contact points | Visible rub marks, polished spots, or compressed finish on the runner or drawer side | These marks identify where friction is occurring. | Mark the high spots, remove only a small amount of material, and test the fit frequently. |
| Surface treatment after fitting | Clean, dry, smooth wood on the contact surfaces | Dust, old wax, rough fibers, or finish buildup can increase friction. | Remove debris, smooth sharp fibers, and apply a thin suitable dry wood lubricant only after the fit is corrected. |
| Moisture source check | No active leak, condensation, damp wall contact, or wet floor beneath the dresser | A continuing moisture source can cause the drawer to stick again after repair. | Resolve the source first, then let the furniture stabilize before final sanding, refinishing, or adjustment. |
| Final movement test | Drawer opens and closes smoothly without forcing or side-to-side scraping. | Smooth movement suggests that the main friction or alignment problem has been addressed. | Test the drawer empty and loaded lightly; stop if resistance, cracking, or structural movement occurs. |
Note: Wood moisture content varies with species, construction, indoor climate, and season. Use the 6–8% range as a practical reference for typical indoor furniture, not as a substitute for checking the furniture’s condition and local environment.
A sticking wooden drawer usually has one localized high spot, not a complete alignment failure.
Remove the drawer and inspect its runners, corners, and underside for shiny rub marks. Mark those areas with a soft pencil. The USDA Forest Products Laboratory’s Wood Handbook places many indoor wood conditions near 6–10% moisture content at moderate relative humidity. Seasonal moisture changes can tighten an old drawer unexpectedly. Do not plane the entire edge. Use a sharp hand plane, taking thin shavings from the marked spot. Reinstall the drawer after every pass and test it with light pressure. This slow loop protects the original fit.
When the drawer moves freely but still feels rough, sand the planed area with 120-grit abrasive. Use a flat sanding block and follow the grain. Then refine the surface with 150- or 180-grit abrasive. The 180-grit finish is usually enough for a hidden runner. Finer sanding may reduce useful clearance. NIOSH’s occupational wood-dust review emphasizes source control during cutting and sanding, so use extraction and a well-fitted particulate respirator. Keep the abrasive flat. I have sometimes removed too much material by sanding only one corner. That mistake creates wobble. Check both sides, especially near the front stop, and leave the pencil marks partly visible until the final test.
A sticking drawer usually needs patience, not force. I remove the drawer and inspect both wooden runners under bright, angled light. Look for shiny rub marks, loose joints, swollen edges, or hardened finish. The USDA Forest Products Laboratory’s Wood Handbook, FPL-GTR-282 (2021), explains that wood moves with moisture. Tangential movement is often about twice radial movement in many species. That matters in older dressers.
Wax the runners lightly with plain furniture wax or a dry paraffin-based wax. Avoid a thick coating; it can collect dust and create fresh resistance. Rub along the full runner length, including the front corners. Refit the drawer squarely, then push it halfway in. Pull it out again. Repeat this test several times. The drawer should travel smoothly without lifting, twisting, or scraping. Check the final 5 centimeters carefully, where misalignment often becomes obvious.
Tips: Mark the left and right runners before removing anything. If one runner sits higher, loosen its screws slightly and realign it. Use a thin card to compare gaps on both sides. The Wood Handbook also warns that moisture-related movement varies by species and grain direction, so sanding should be minimal. I once sanded too much from a stubborn drawer. It moved freely, but later rattled. That was my mistake. Test the full travel before removing more wood. A soft brush can clear old grit from the runner channel. Wax only after the surfaces are clean and dry.
Empty the drawer completely. Remove it slowly while supporting both sides. Inspect it under bright, angled light.
Test the drawer gently several times. Mark tight spots with low-tack tape or a pencil. Check both sides, edges, and corners.
Yes. Slide paper around the opening. Note where it stops or feels tight. Photograph each marked location before repairing.
Look for swollen wood, worn runners, loose screws, rough finish, splits, or a twisted drawer. The cabinet opening may also be slightly uneven.
No. Inspect first. I once sanded too early, and the drawer later became loose. Remove only tiny amounts after testing.
Wood expands and contracts as indoor humidity changes. A moisture reading around 6–8% suits typical indoor furniture. Check several locations.
Let the dresser acclimate indoors for several days. Keep it away from radiators, vents, and damp exterior walls. Recheck it afterward.
Brush grit from the runners. Apply a thin coat of plain furniture wax or dry paraffin-based wax. Avoid thick layers.
Refit it squarely and push it halfway in. Pull it out repeatedly. Check the final five centimeters for scraping or twisting.
Check uneven runners, loose joints, and a twisted case. Use a thin card to compare both gaps. My first diagnosis may be wrong.
How to fix a sticking wooden drawer in an old dresser begins with a careful inspection. Remove the drawer and look for rub marks, swollen areas, or uneven contact along the runners and sides. Mark every binding point, then measure the side gaps to determine whether the drawer has enough clearance. For indoor furniture, a moisture content of approximately 6–8% is a useful target, since excess humidity can cause wood to expand and stick.
Correct the problem gradually by planing only the marked high spots, taking light passes and checking the fit often. Once the drawer moves more freely, smooth the adjusted areas with 120–180-grit abrasive to remove rough fibers and splinters. Apply a small amount of furniture wax to the runners, refit the drawer, and test its full travel several times. The drawer should open and close smoothly without excessive looseness or force.

Q-Flow Home